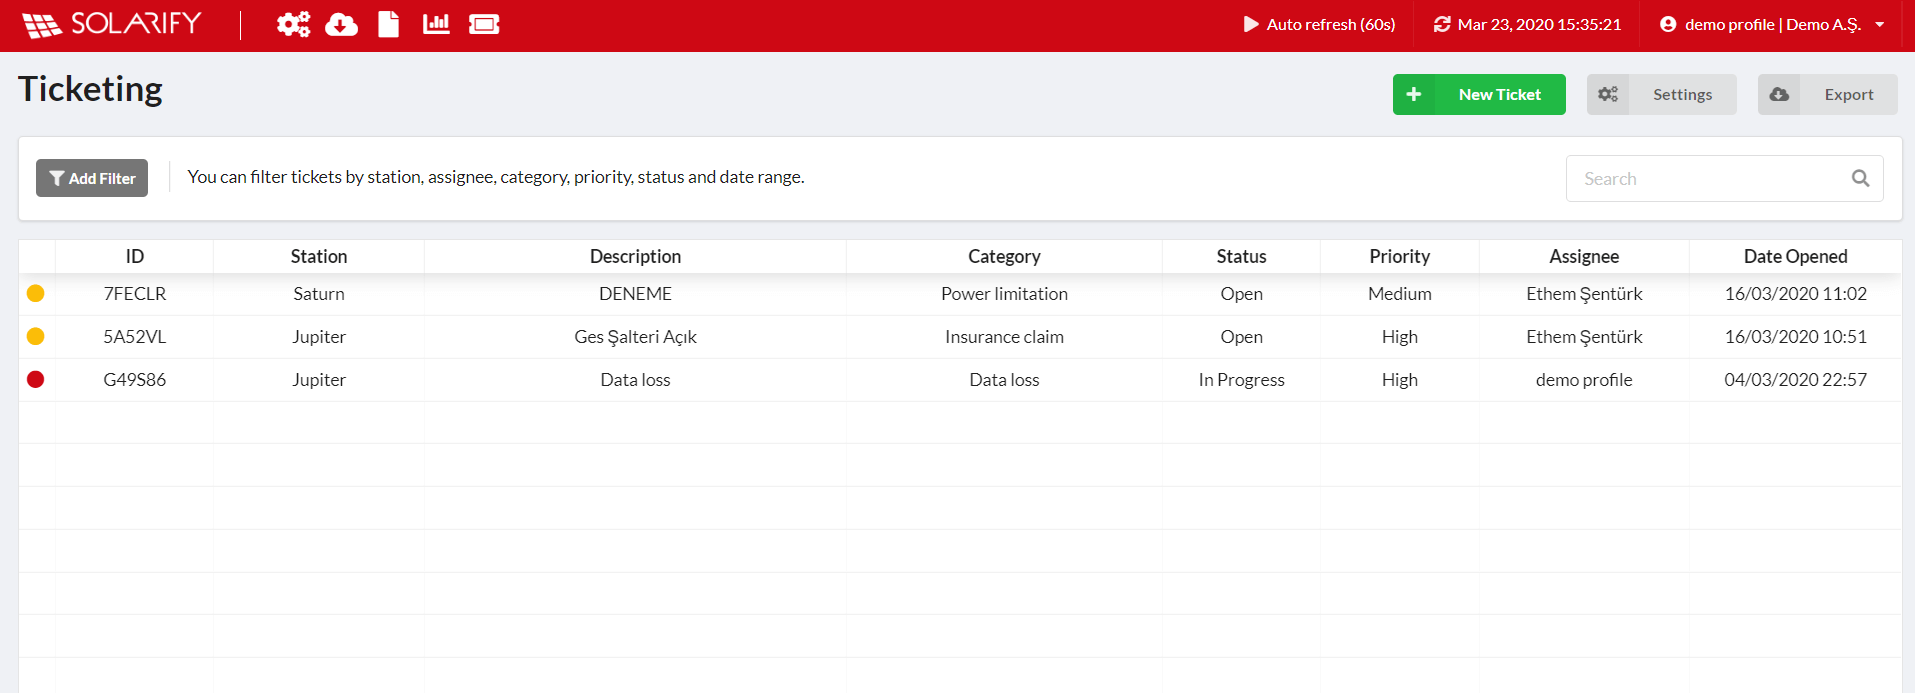
Ticketing
It is the page that provides better management of operation and maintenance within the station. From this page, admin, manager and technician accounts linked to the station can assign ticket to each other. All details of the ticket (connected devices, documents or images) can be specified. when creating a new ticket. Opened tickets are listed on this page.
Description of Colors
- Yellow --> open ticket
- Red --> in progress
- Blue --> completed
- Grey --> closed
- Purple --> evaluation reject
- Orange --> reject
- If the ticket is red and flashes to cover the entire line, the stage reached in the ticket is your responsibility.
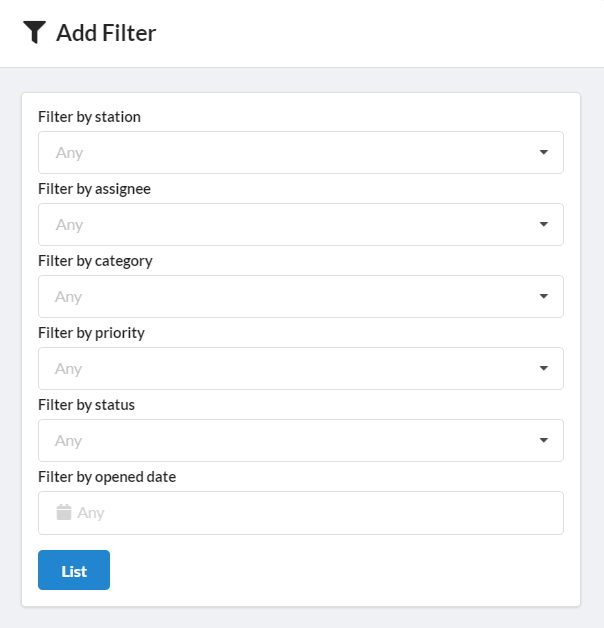
Add Filter
By clicking this button, filtering can be done according to the station, assigne, category, priority, status, opening date.
New Ticket
Clicking this button opens the page to create a ticket.
Basic Info
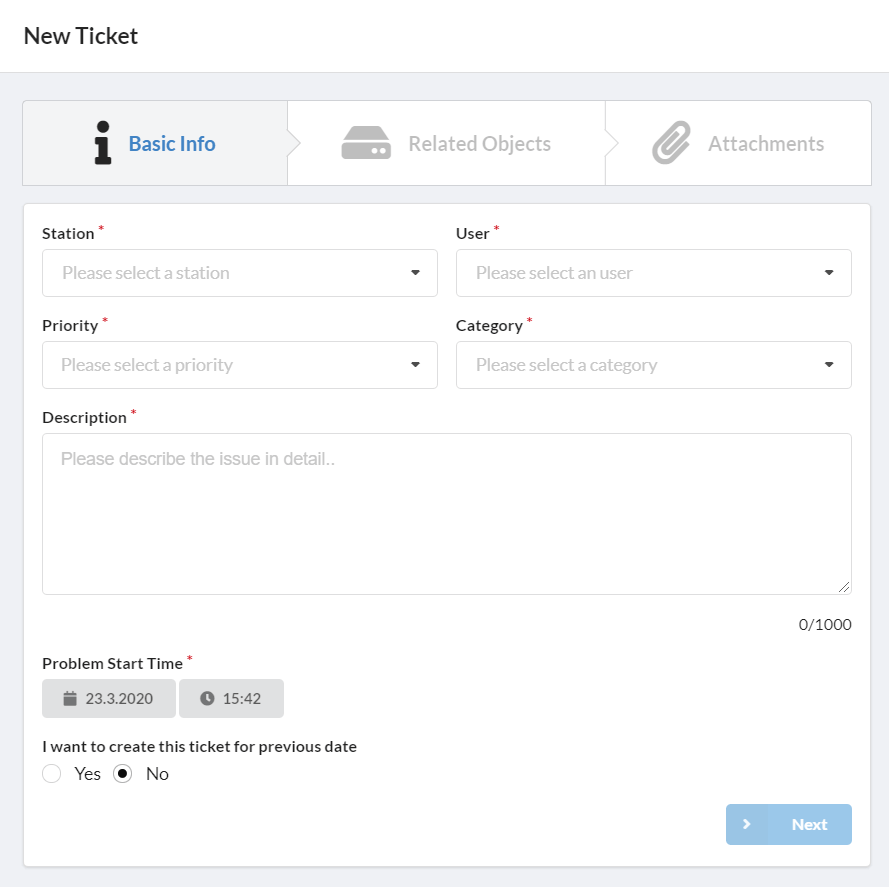
The station where the ticket will be opened, which user to assign, the priority status (low, medium, high, critical) and its category are specified. The subject is detailed in the description section. The starting date and time of the problem are entered. If you want to create a previous ticket, I want to create this ticket with the previous date Yes is selected under the text, and then the next step is called by entering the date and time information again.
Related Objects page opens.
Related Objects
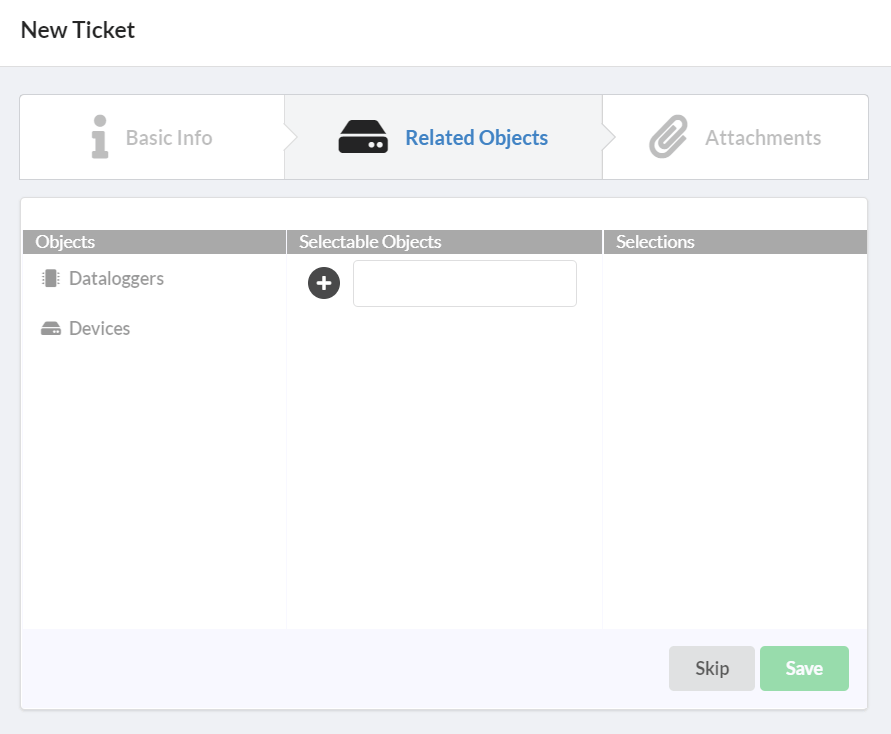
If the ticket is related to a device in the station, the desired devices are selected from the objects on the left and the save button is clicked. If the ticket has nothing to do with any device, click the skip button.
Attachments page opens.
Attachments
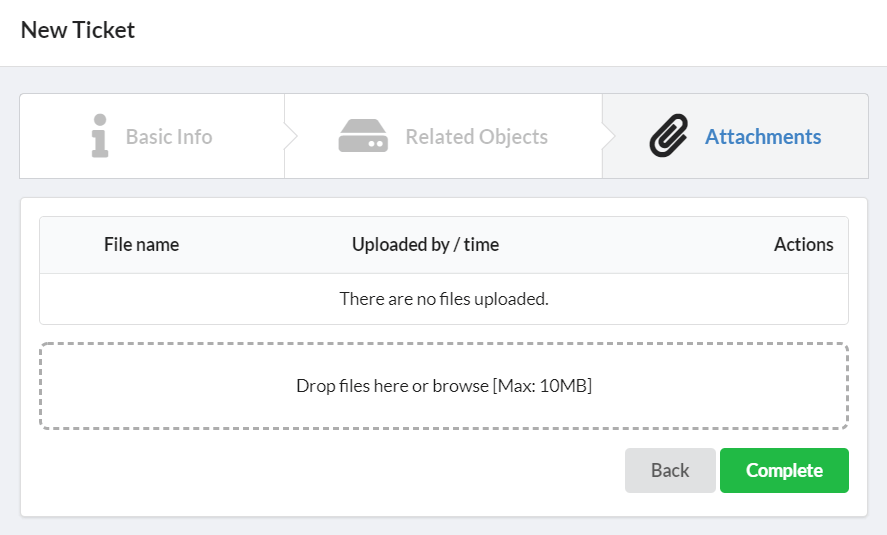
In addition to the ticket, drag and drop your files in * .jpeg * .png * .pdf * .xlsx * .xls * .txt * .csv * .doc * .docx formats here and click on the complete button. Work order was created.
Note: Note: A maximum of 10 files can be uploaded and the total file size that can be uploaded is 10 MB.
After completing the above steps, the ticket will go to the assigned person by e-mail.
Note: If telegram settings have been made, a notification will also be sent to the telegram group established.
Takeover and Complete the Opened Ticket
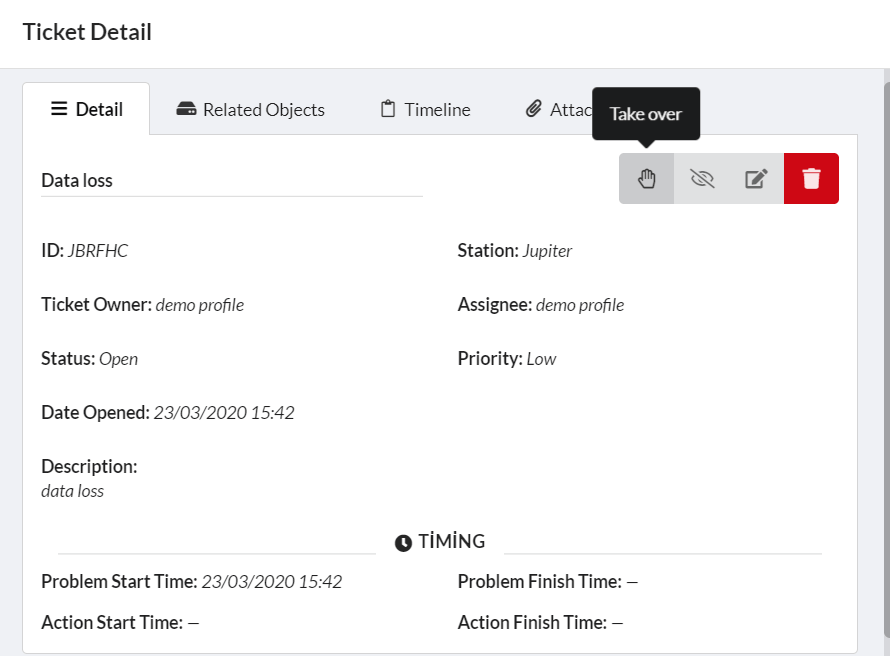
If the ticket is assigned to you, you will be notified by e-mail or telegram and you can go to the ticket detail page by clicking on the link. Then you can start working on the job by clicking on the takeover button. The job is now your responsibility.

When the ticket is completed, go to the same detail page and press the Complete ticket button. A new page opens to explain the process.
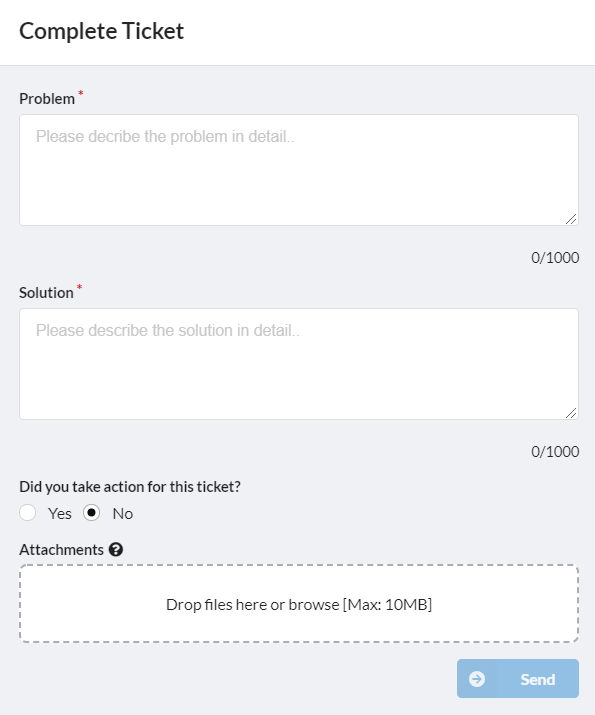
On this page, problem and solution details are written. Whether or not there is an intervention for this job is indicated by the yes and no buttons. If available, the relevant file is loaded. The ticket is then sent to the admin and manager accounts on the station for evaluation. If approved, one of the admin or manager accounts closes the ticket. If it is not approved, the ticket is sent back to the person to whom it is assigned. And necessary interventions are made for the ticket.
When the ticket is closed, the report is sent to the report contact that you set in settings by e-mail.
Attention: In the case of energy loss, the problem start and end times are used to calculate the energy predicted by artificial intelligence, so entering the right time is important.
Note: When you click on the opened ticket, you can access all the details and follow the operation with the timeline tab.
Export
When this button is clicked, the ticket displayed on the page are exported. It can be exported in different groups by adding filters.This file contains all the information about the tickets except for the attachments.
Settings
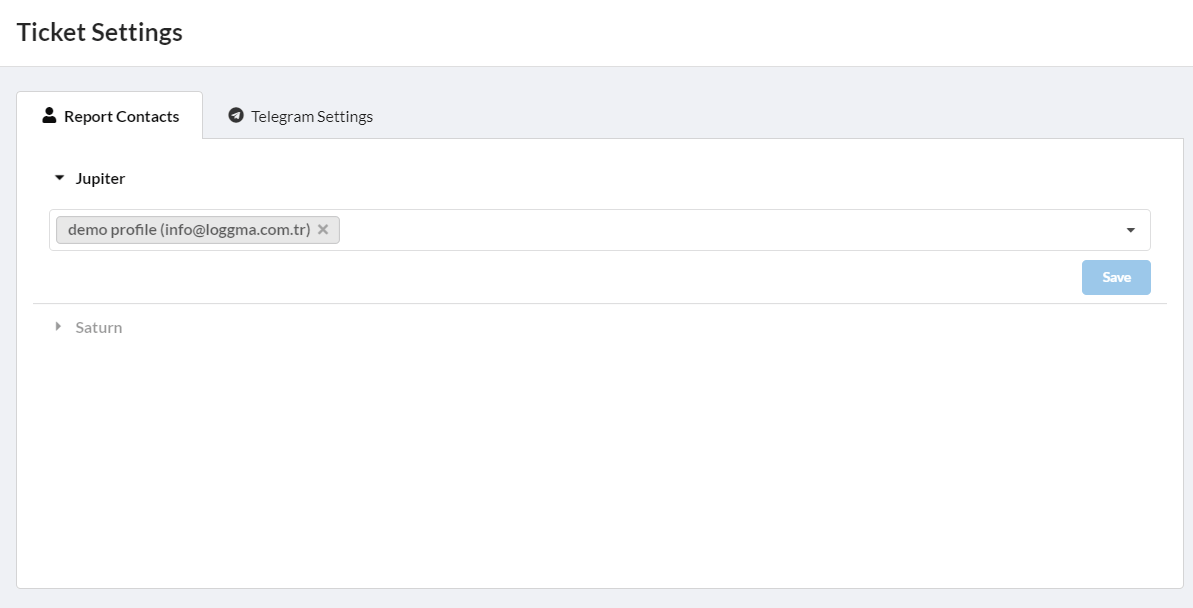
Report Contacts
After the tickets are closed, to whom the report in pdf format will be sent to by email is determined here.
Different or the same people can be determined for each station.
Attention: Only e-mails of the people defined in the station can be added here.
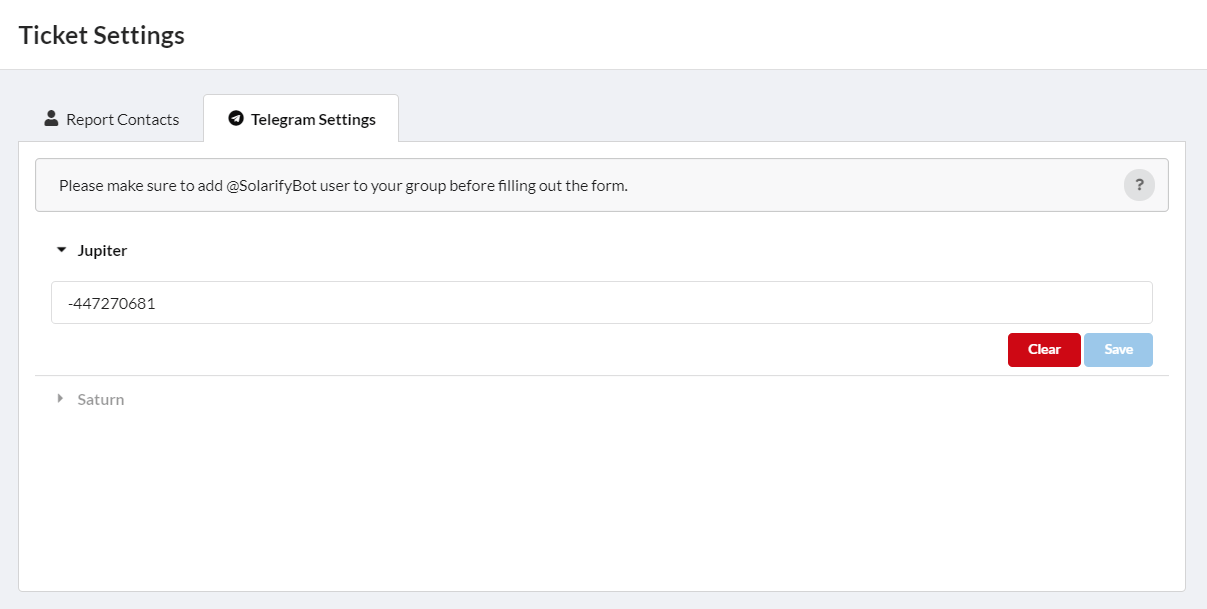
Telegram Settings
It provides easy management of tickets via the telegram application (mobile). After the related settings are made, all details related to the tickets in the station fall into the telegram group.
Note: You can also observe the steps of the ticket when you click on the ticket detail and go to the timeline tab. In order to use this application:
- Install the telegram application on your phone.
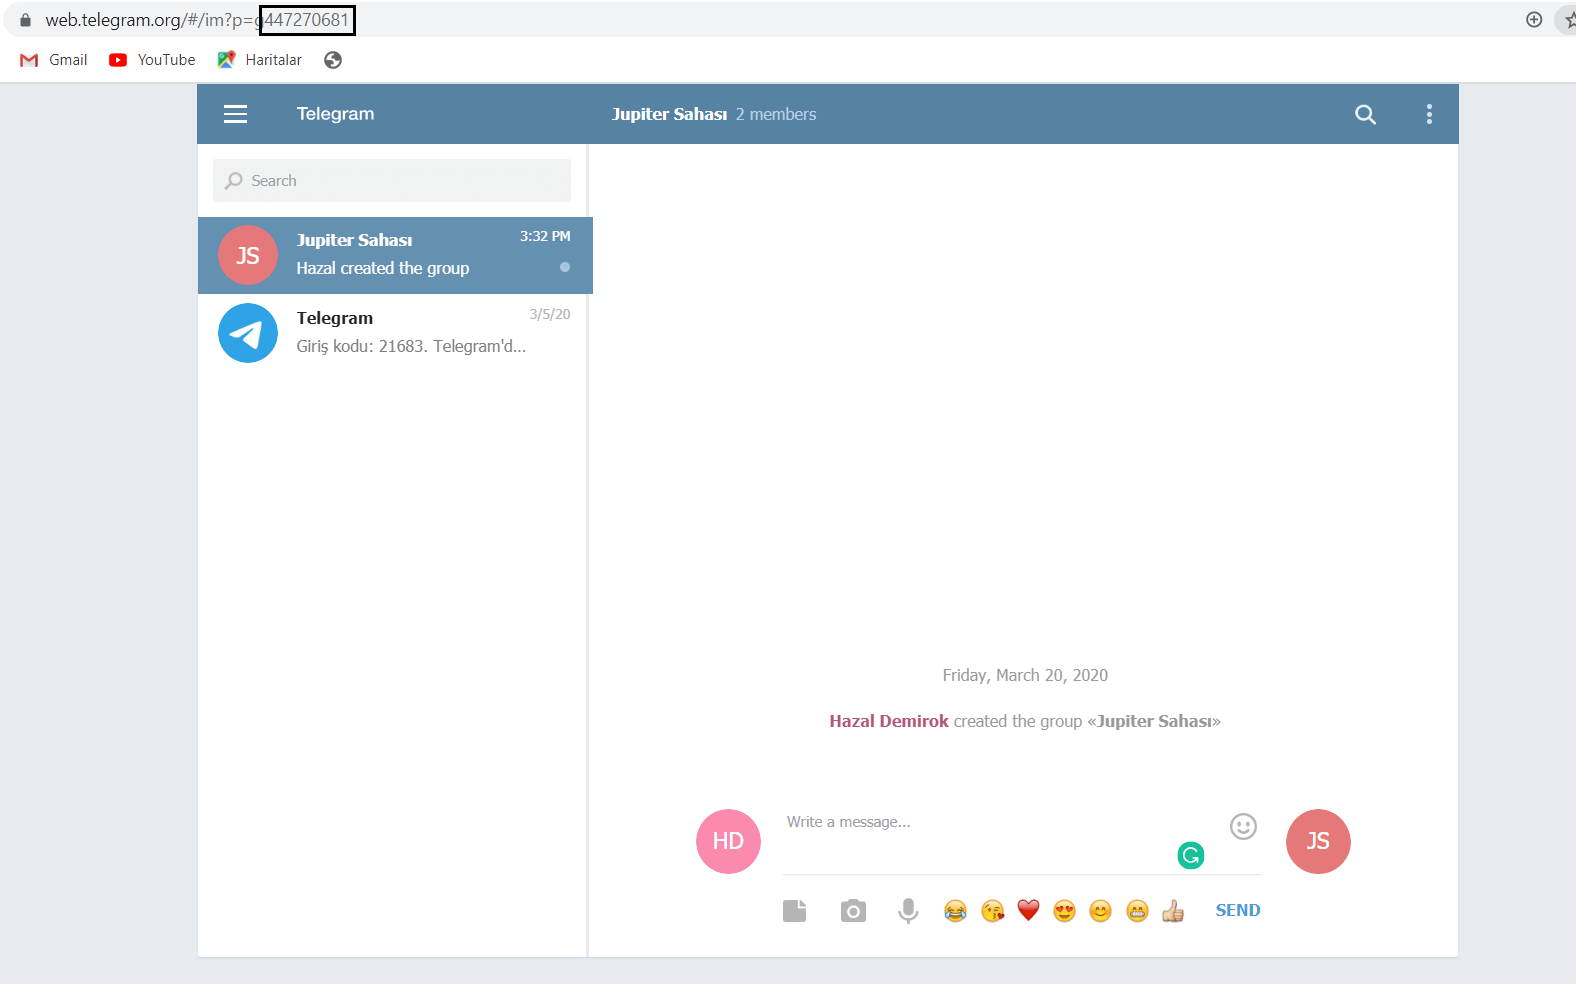
- Then go to web.telegram.org and access your account from there.
-
Create a group and add the people in the station to this group.
-
Click on the group name and then click on the 'add member' button.

-
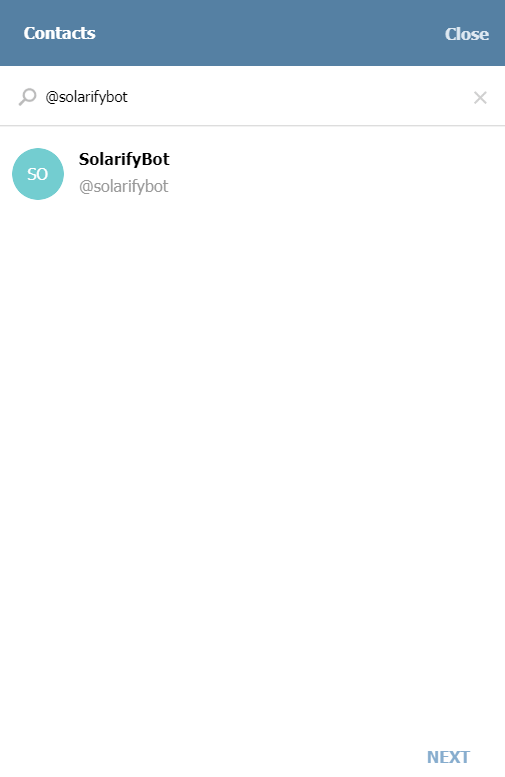
In the page that opens, search for the name @solarifybot and add it to the group.
-
[3] Copy the last digits in the address bar as marked in the image in item 3, and paste wit '-' at the id part of the relevant station from the telegram settings section on the Ticket settings page and click the save button.If your Telegram group is 'supergroup', add '-100' to the numbers you copied from the address bar.
In what cases does the group change to supergroup?
- If the person who created the group appoints another person from the group as admin with full authority, the group will change to 'supergroup'.
- You can convert the group yourself by clicking upgrade to supergroup from the Group Info section.
- If the number of member in the group exceeds 1000, the group will change to 'supergroup'.
The webinar link, where we explain our Ticketing page with examples in Turkish: Operations Management with Solarify in SPP